1. What is an Event-Based Trigger in ControlHippo?
An Event-Based Trigger allows you to start a flow automatically when a specific event occurs in your external system.
This trigger is especially useful for automating responses or actions like:
Sending order confirmations
Notifying customers of updates
Triggering workflows based on user activity
You can connect your own system using a webhook URL generated within ControlHippo.
2. How do I create an Event-Based Trigger flow?
Follow these steps to set up an Event-Based Trigger in ControlHippo:
Step 1: Log in
Open your ControlHippo account and access your dashboard.
Step 2: Start a New Flow
Click on Work Flow Builder in the left sidebar and then click the Create Flow button.
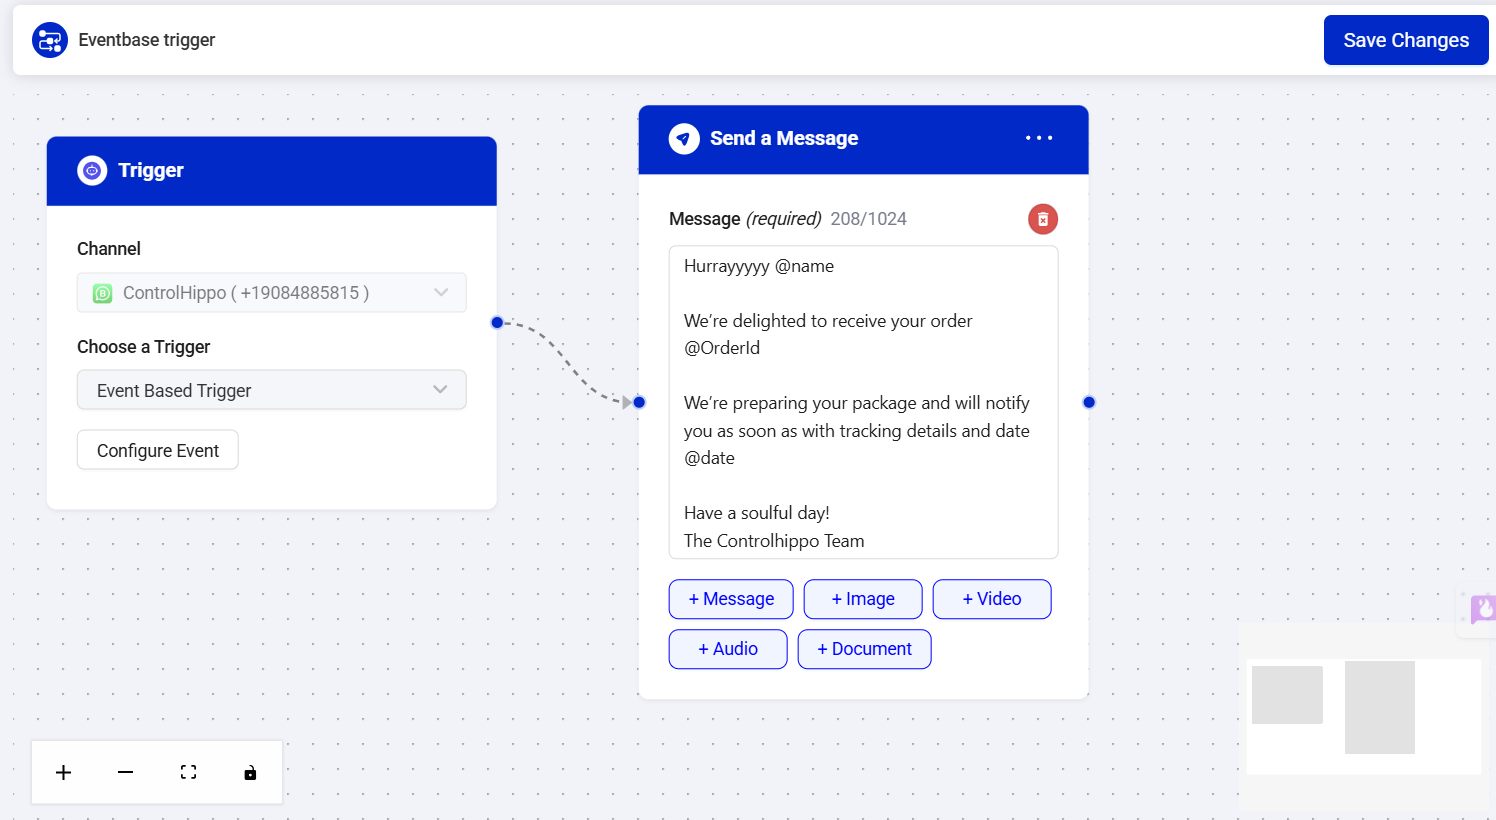
Step 3: Add Trigger (Default on Screen)
When you open the Flow Builder, a Trigger node will already appear by default on your screen.
From the dropdown menu under Trigger, select Event-Based Trigger.

Step 4: Configure the Event
Click on Configure Event — a sidebar will open on the right side of your screen.
Step 5: Add Variables
A sidebar will open where you can add variables as per your use case.
You can also include additional variables (like {name}, {date}, {orderId}) to personalize messages or pass dynamic data.
Step 6: Save the Configuration
Once you click Save, the Webhook URL will become visible.
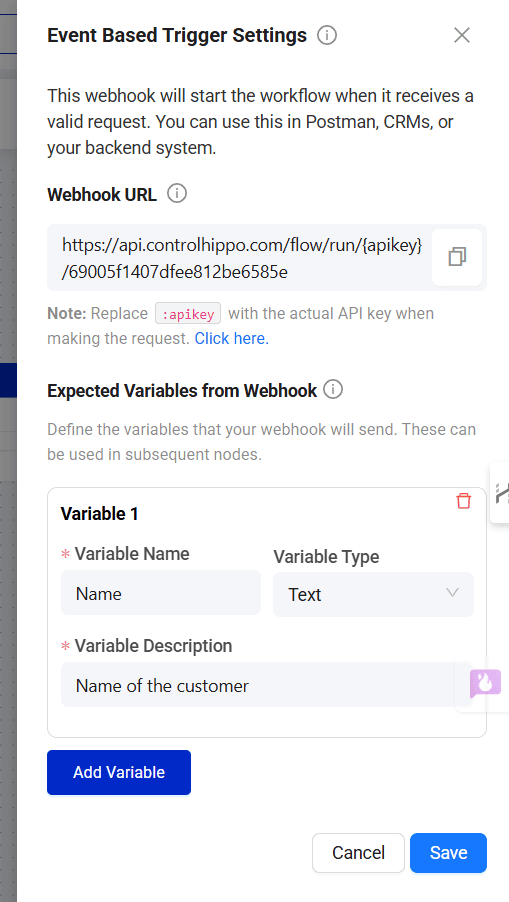
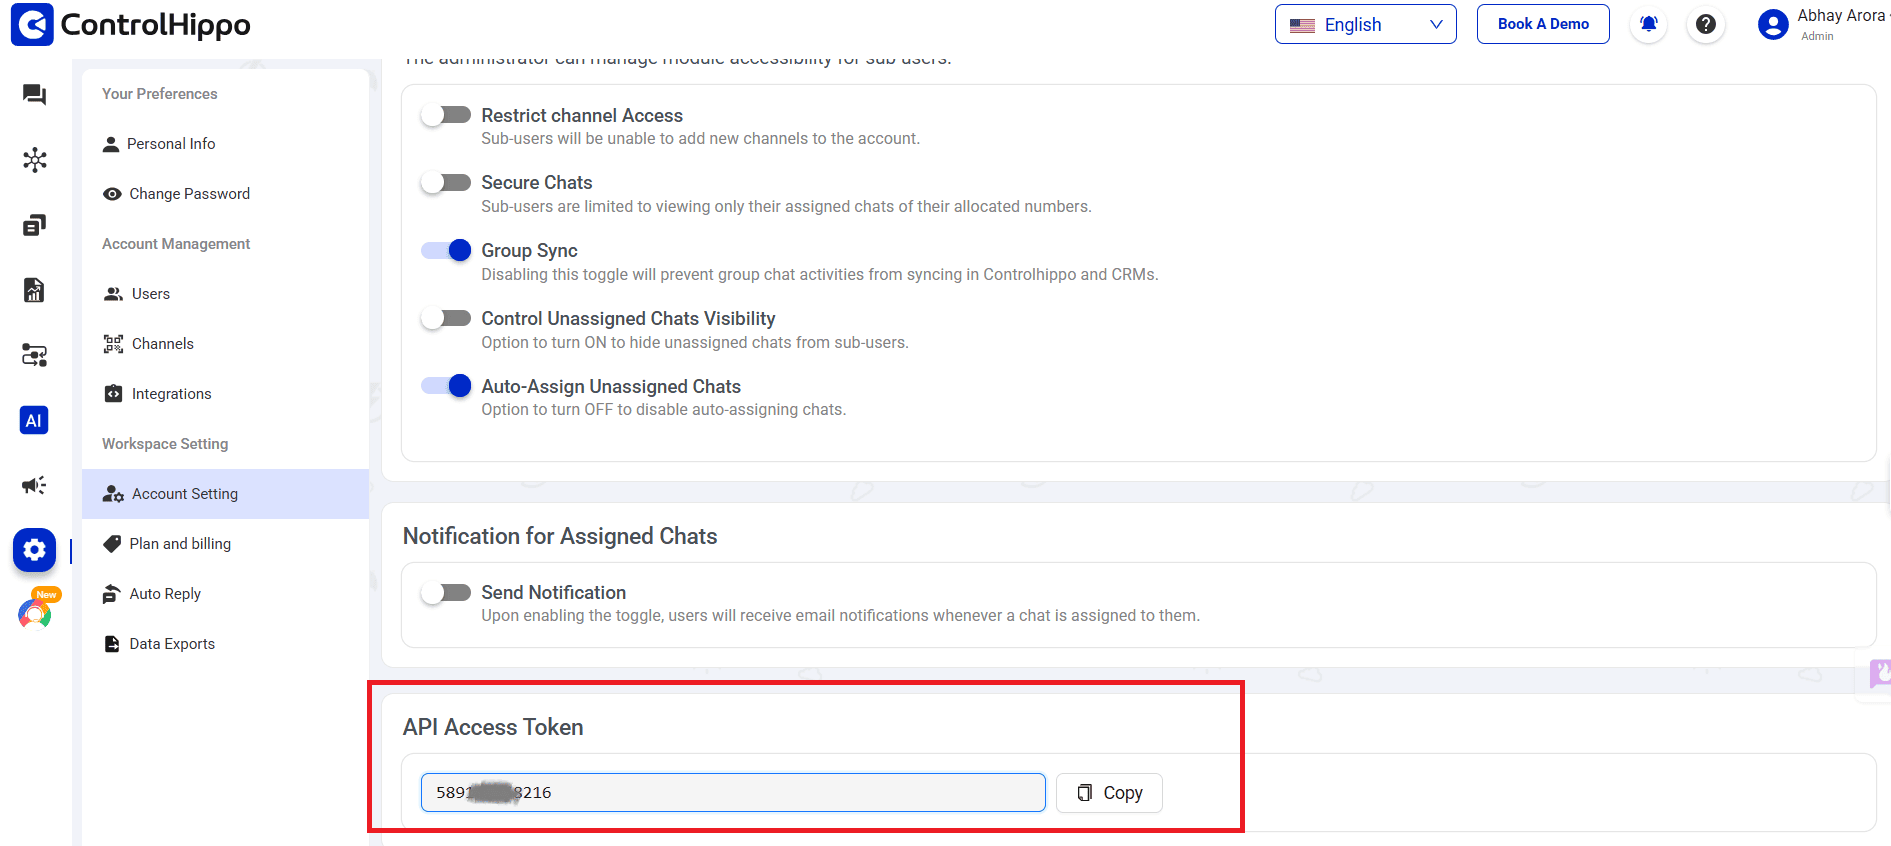
Step 7: Find and Use API Key
Go to Account Settings → API Key section
Copy your unique API key
Use it to replace {{:apikey}} in the Webhook URL
Note - The owner/Admin will only have the visibility to access the API access token.
Step 8: Using Variables in Other Nodes
To use any variable in another node, simply type @ and select the variable name
Note - You can test your flow by sending a test API request from an external tool like Postman or cURL using the webhook.
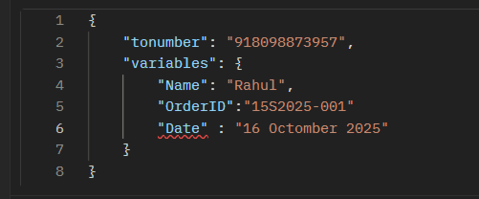
3. What should I include in the request body?
The minimum required field is:
The "tonumber" field is mandatory and must be included in the request body.
The "tonumber" must include the country code (without “+”).
You can also include additional variables (like {name}, {date}, {orderId}) to personalize messages.
4. Which platforms support Event-Based Triggers?
Currently, the Event-Based Trigger API supports:
WhatsApp Scan and WhatsApp Business API
Telegram
5. How can I test the flow before going live?
You can test the webhook by:
Using Postman or any HTTP client to send a POST request.
Including the correct parameters (tonumber and variables).
Checking the response status (200 OK indicates success).
If your flow executes successfully (e.g., message is sent), it means your configuration is correct.
6. Can I use Event-Based Trigger with other steps like AI Agent or Assign to?
Yes. Once your event is triggered, you can connect subsequent steps like:
AI Agent: For automated responses.
Assign To: To route the chat to a specific agent or team.
This enables fully automated workflows initiated by external system events.
7. What happens if the event trigger does not fire?
If the flow is not triggered after an API call:
Double-check the Webhook URL (ensure the API key is correct).
Verify that your flow is active.
Confirm that the event request format matches the required structure.
Ensure the trigger type is correctly set to “Event-Based Trigger.”
List of Possible API Errors
# | HTTP Status | Message | Additional Details |
1 | 400 | Invalid API key. | Invalid API Key |
2 | 400 | To number is required. | The "tonumber" filed in the Request body is missing. |
3 | 400 | Only event based trigger flows can be activated via API. | You need to check that the trigger type event is selected in the workflow. |
4 | 400 | Only approved flows can be activated. | Check if the workflow status is Approved. |
5 | 400 | Variable mismatch. | You need to check that the variables in the request body and workflow match (case-sensitive). |
6 | 400 | Your number has been disconnected. Please re-scan your number to continue message synchronization in ControlHippo. | Check Channel status. |
7 | 400 | Tonumber is not registered with WhatsApp. | To number is not registered with Whatsapp |
8 | 400 | The mobile number isn't registered or has privacy settings enabled. | The mobile number isn't registered or has privacy settings enabled. |
Was this article helpful?
That’s Great!
Thank you for your feedback
Sorry! We couldn't be helpful
Thank you for your feedback
Feedback sent
We appreciate your effort and will try to fix the article